Invoices1 min read
Set up recurring invoices
Create a schedule for work you bill regularly and see what will be sent next.
For work you bill regularly, prepare an invoice schedule. Saving creates a draft; review and activate it separately before automatic invoicing starts.
1. Open your invoice schedules
Go to Invoices. Tap the clock icon to create and manage recurring invoices.
2. Schedule timing and frequency
Choose the customer and add the invoice lines. Check the business bank account, reference, invoice language and email message.
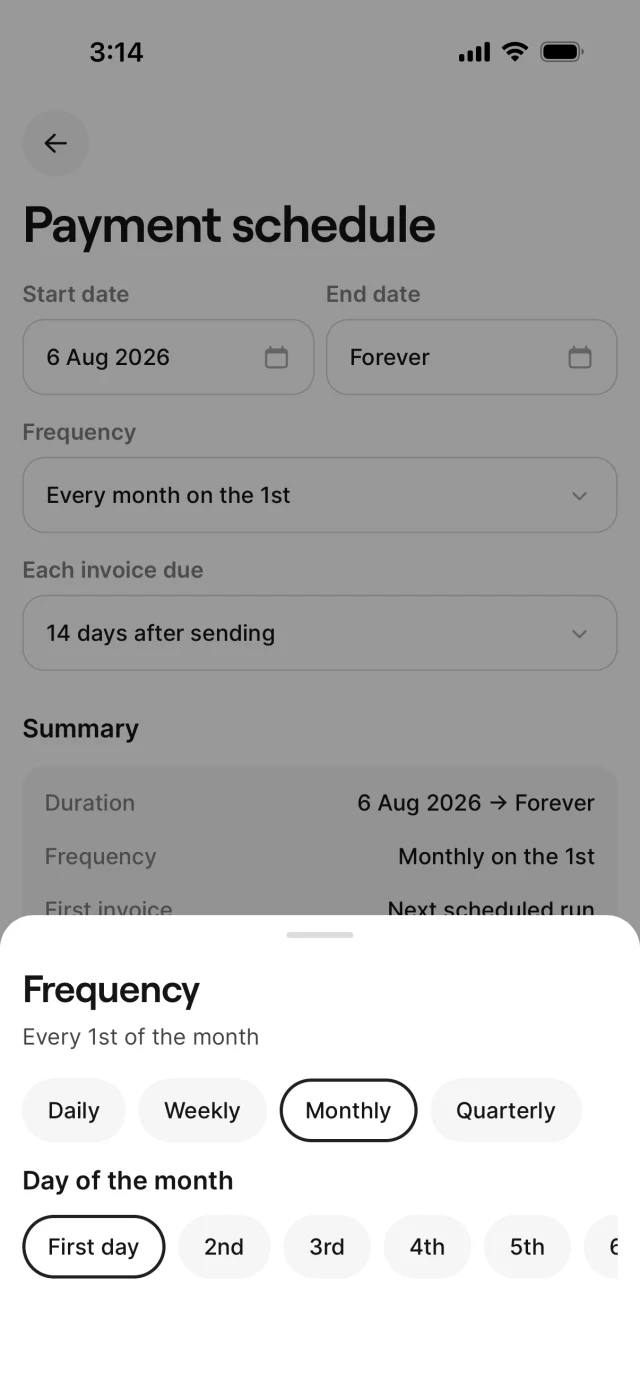
Set the start date, frequency, sending day and optional end date. Review whether the first invoice should be sent now or wait for the next cycle.
3. Save and activate
Save the schedule and open its details. Check the draft before choosing the activation action. Read the confirmation carefully: depending on your first-invoice setting and start date, activation can send the first invoice immediately. Confirm only when the customer, amounts and timing are correct.
4. See what was sent — and what’s next
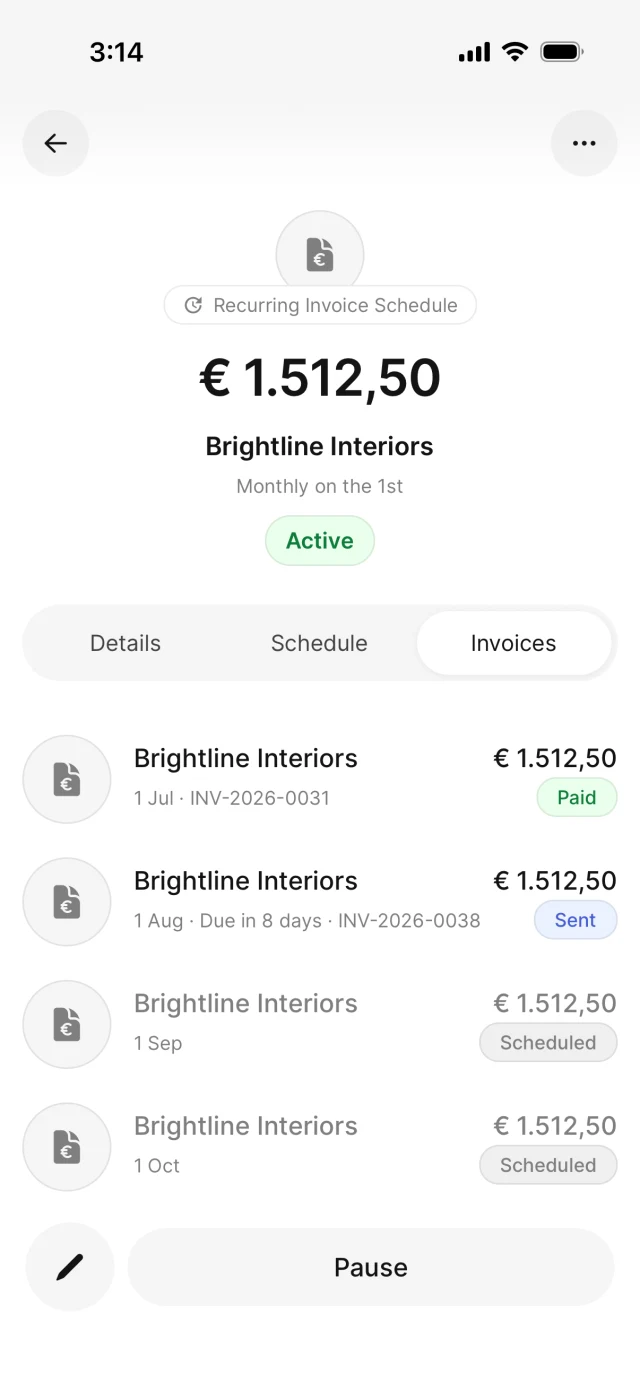
Review invoices already sent and see the upcoming invoices AirBill will create automatically.
View the AirBill getting-started guide
Need a hand?
Get in touch with your question about AirBill. We’re happy to help.